On downhill terrain, obstacles, turns, bushes, and more come at you hot and heavy. Things happen quickly and as Danny Ocean from Ocean’s 11 said, “You lose focus in this game for one second, somebody gets hurt.” This is especially true in mountain biking. One of the easiest ways to ensure you’re dialed in and ready for the terrain is where and how you place your hands on the handlebars. Here’s a few tips on MTB hand position and why it matters.
Cockpit Setup
Before we dive into WHERE and why on MTB hand position, we wanted to bring up the entire cockpit setup. Got Pain? It Might Be High Time To Do A Once Over On Your Mountain Bike Cockpit Setup. Just like Goldilocks, having the bars, seat angle, and height fitted appropriately to you will help you feel better in the saddle. Ergonomics aren’t a fad but a legit issue to consider.
Sweep It Up – Width Of Your Body
There is a lot that goes into getting the right fit on a mountain bike but specifically for MTB hand position a key ingredient is the width of handlebar. You should be able to grab the bars about the width of your body size. For taller riders that sometimes requires a wider handlebar. In turn, to make sure you can still ride comfortably, the bar may need what is called “sweep.” There are two different measurements of sweep: upsweep and backsweep. Upsweep measures the angle at which the bars bend up from the stem. Backsweep, on the other hand (pun intended), measures how far the bars bend back.
Mo Fingahs On The Bar, Mo Betta
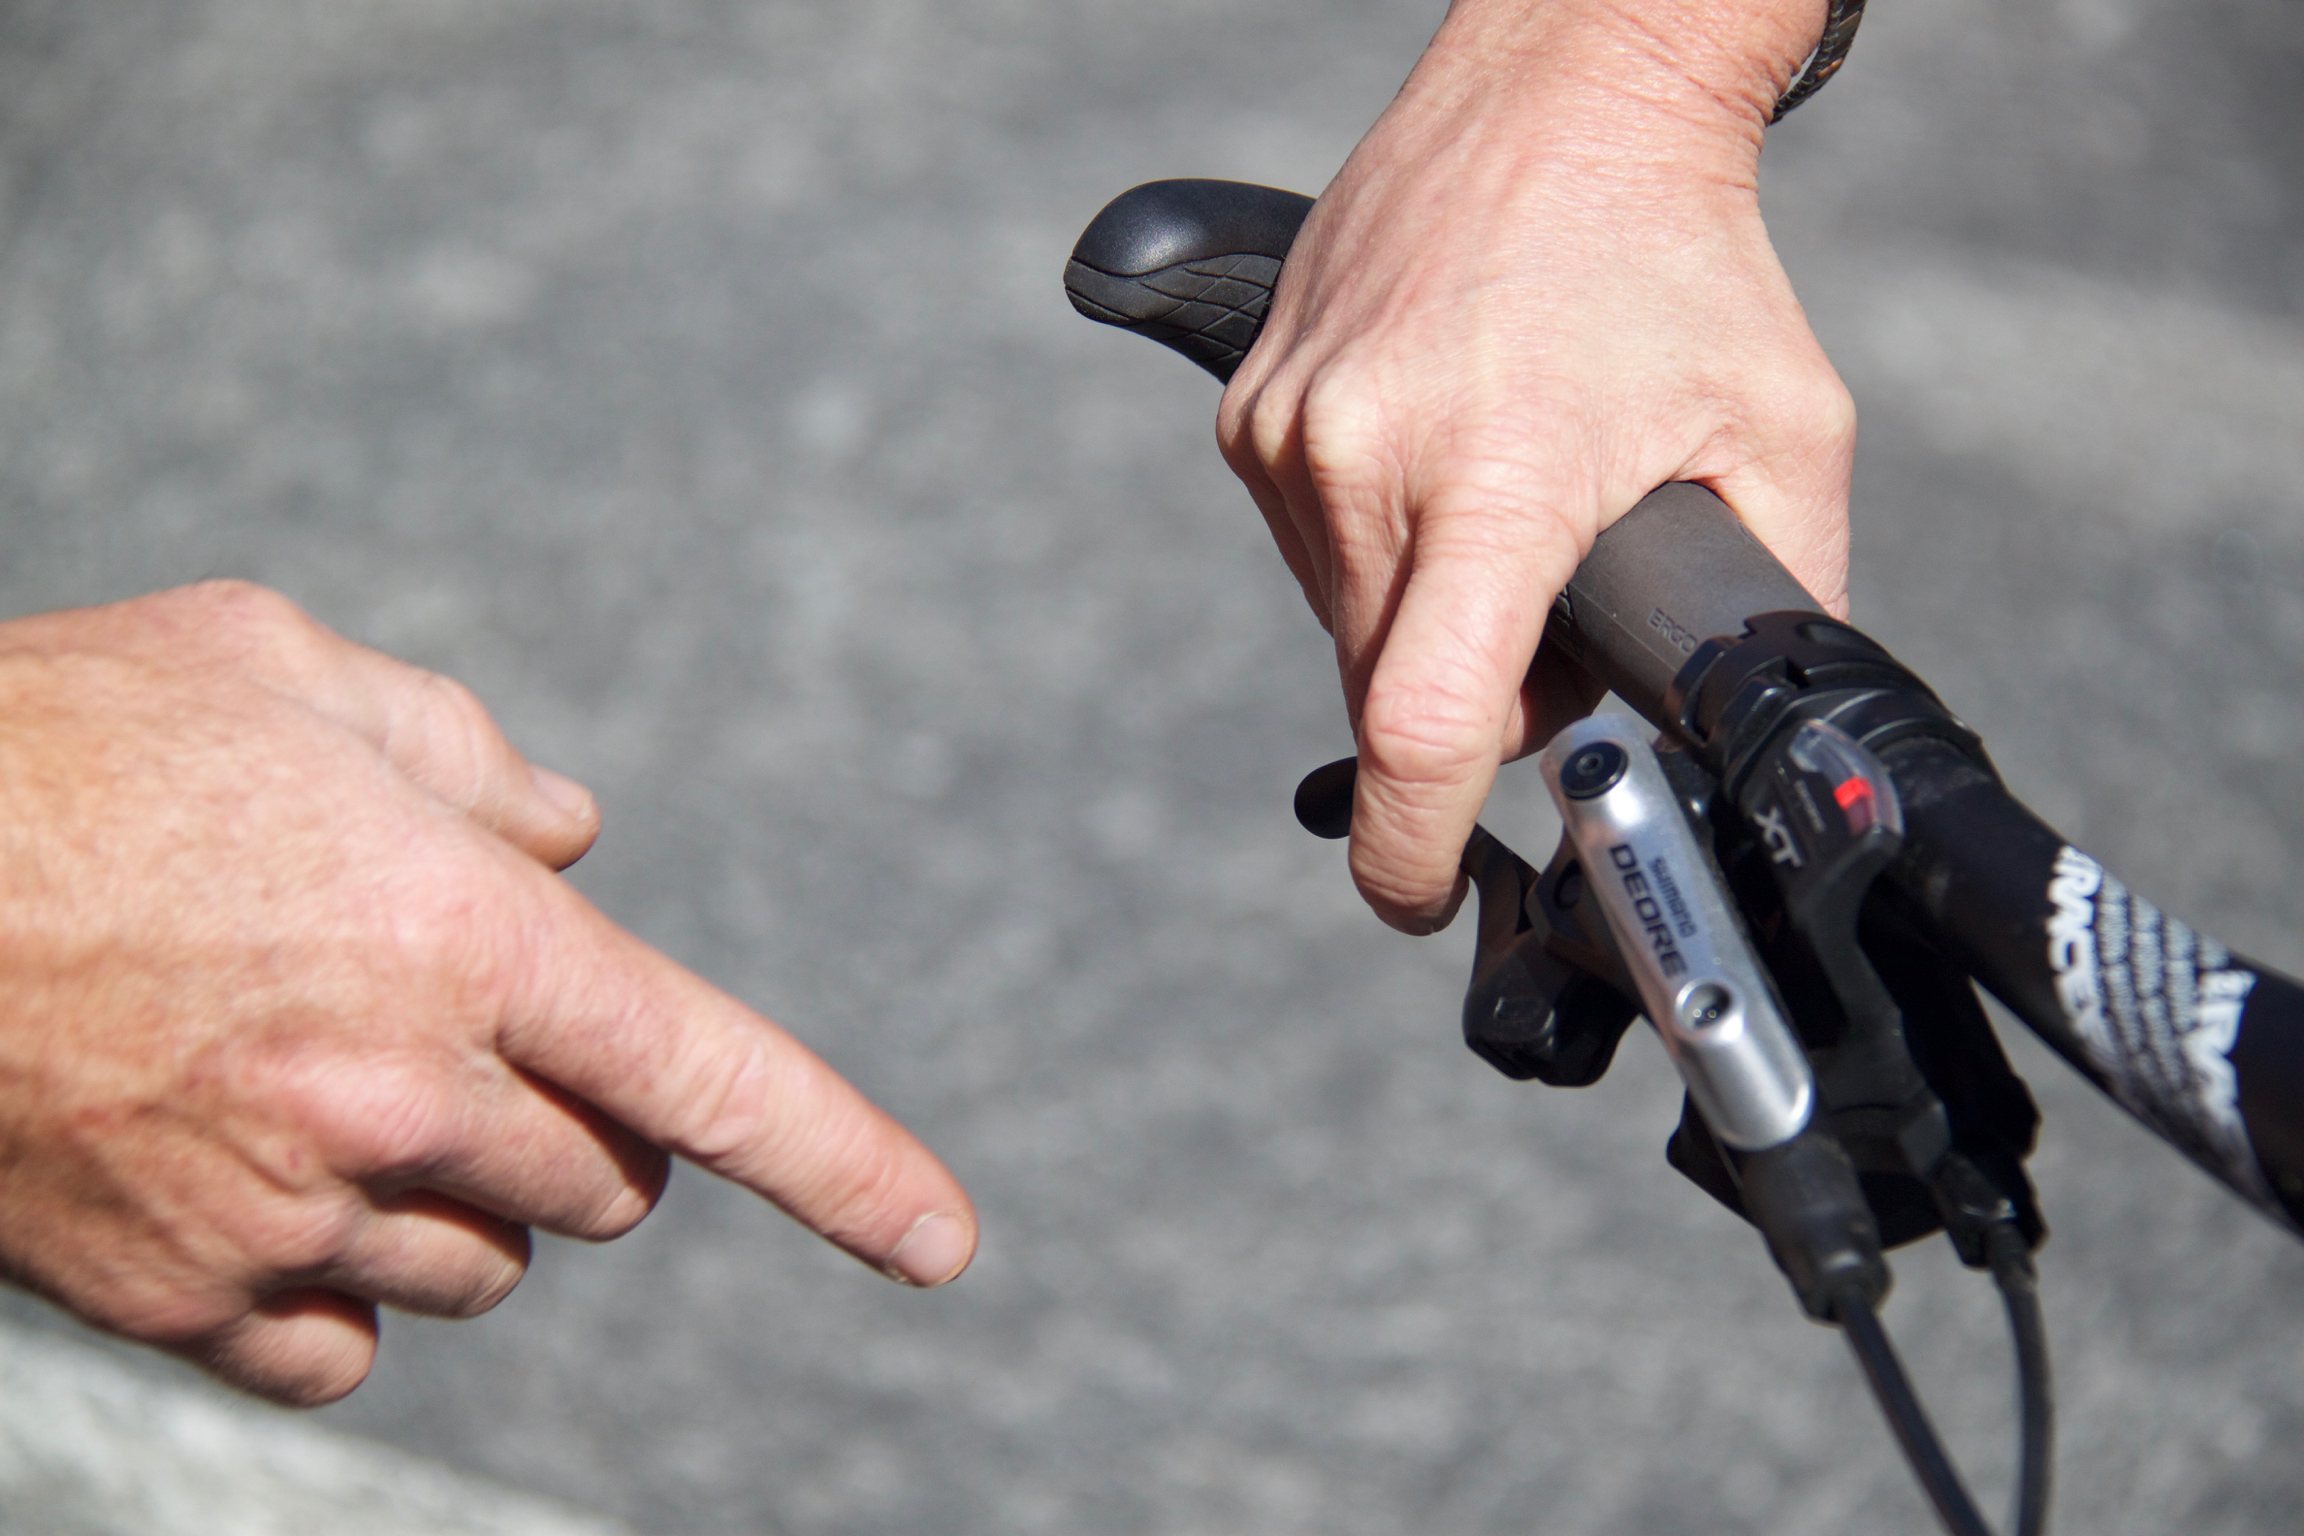
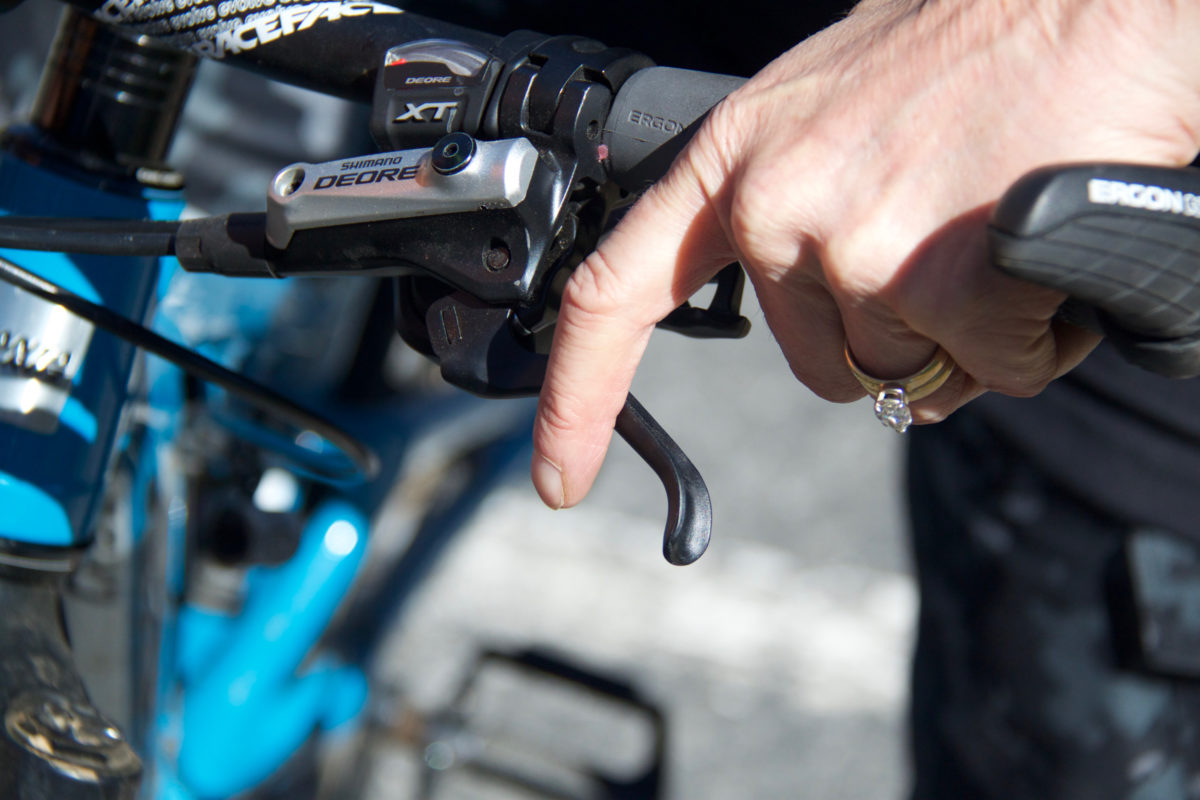 If there’s one quick thing to learn about MTB hand position, it’s this – you should ONLY brake with one finger. The goal is to have as many fingers as possible on the handlebar. That way if something unexpected happens, you won’t lose control. Most of us grew up riding a BMX bike with crappy cable brakes that you needed two fingers to stop it. Fortunately, with modern disc brakes, you only need one finger to get the full stopping power.
How To Increase Leverage
If you feel like you aren’t getting enough leverage, move your brake levers as far inward as you can (closer to the center of the bar). Your finger should press the outermost part of the lever, giving you the most leverage and hence – more braking power.
Keep Those Wrists and Hand Bones Straight
 You should have a bend in your elbows to be used as a shock absorber for bumpy terrain. However, your wrists and hands should be straight. This will reduce the number of injuries as well as ensure you have a strong connection to the handlebars for control.
This is only an introduction into MTB hand position. If you want to learn more and put it into practice, sign up for one of our in-person skills clinics. As our motto goes, “Get A Bike. Ride With Us. Ride Better” and that will be exactly what happens.